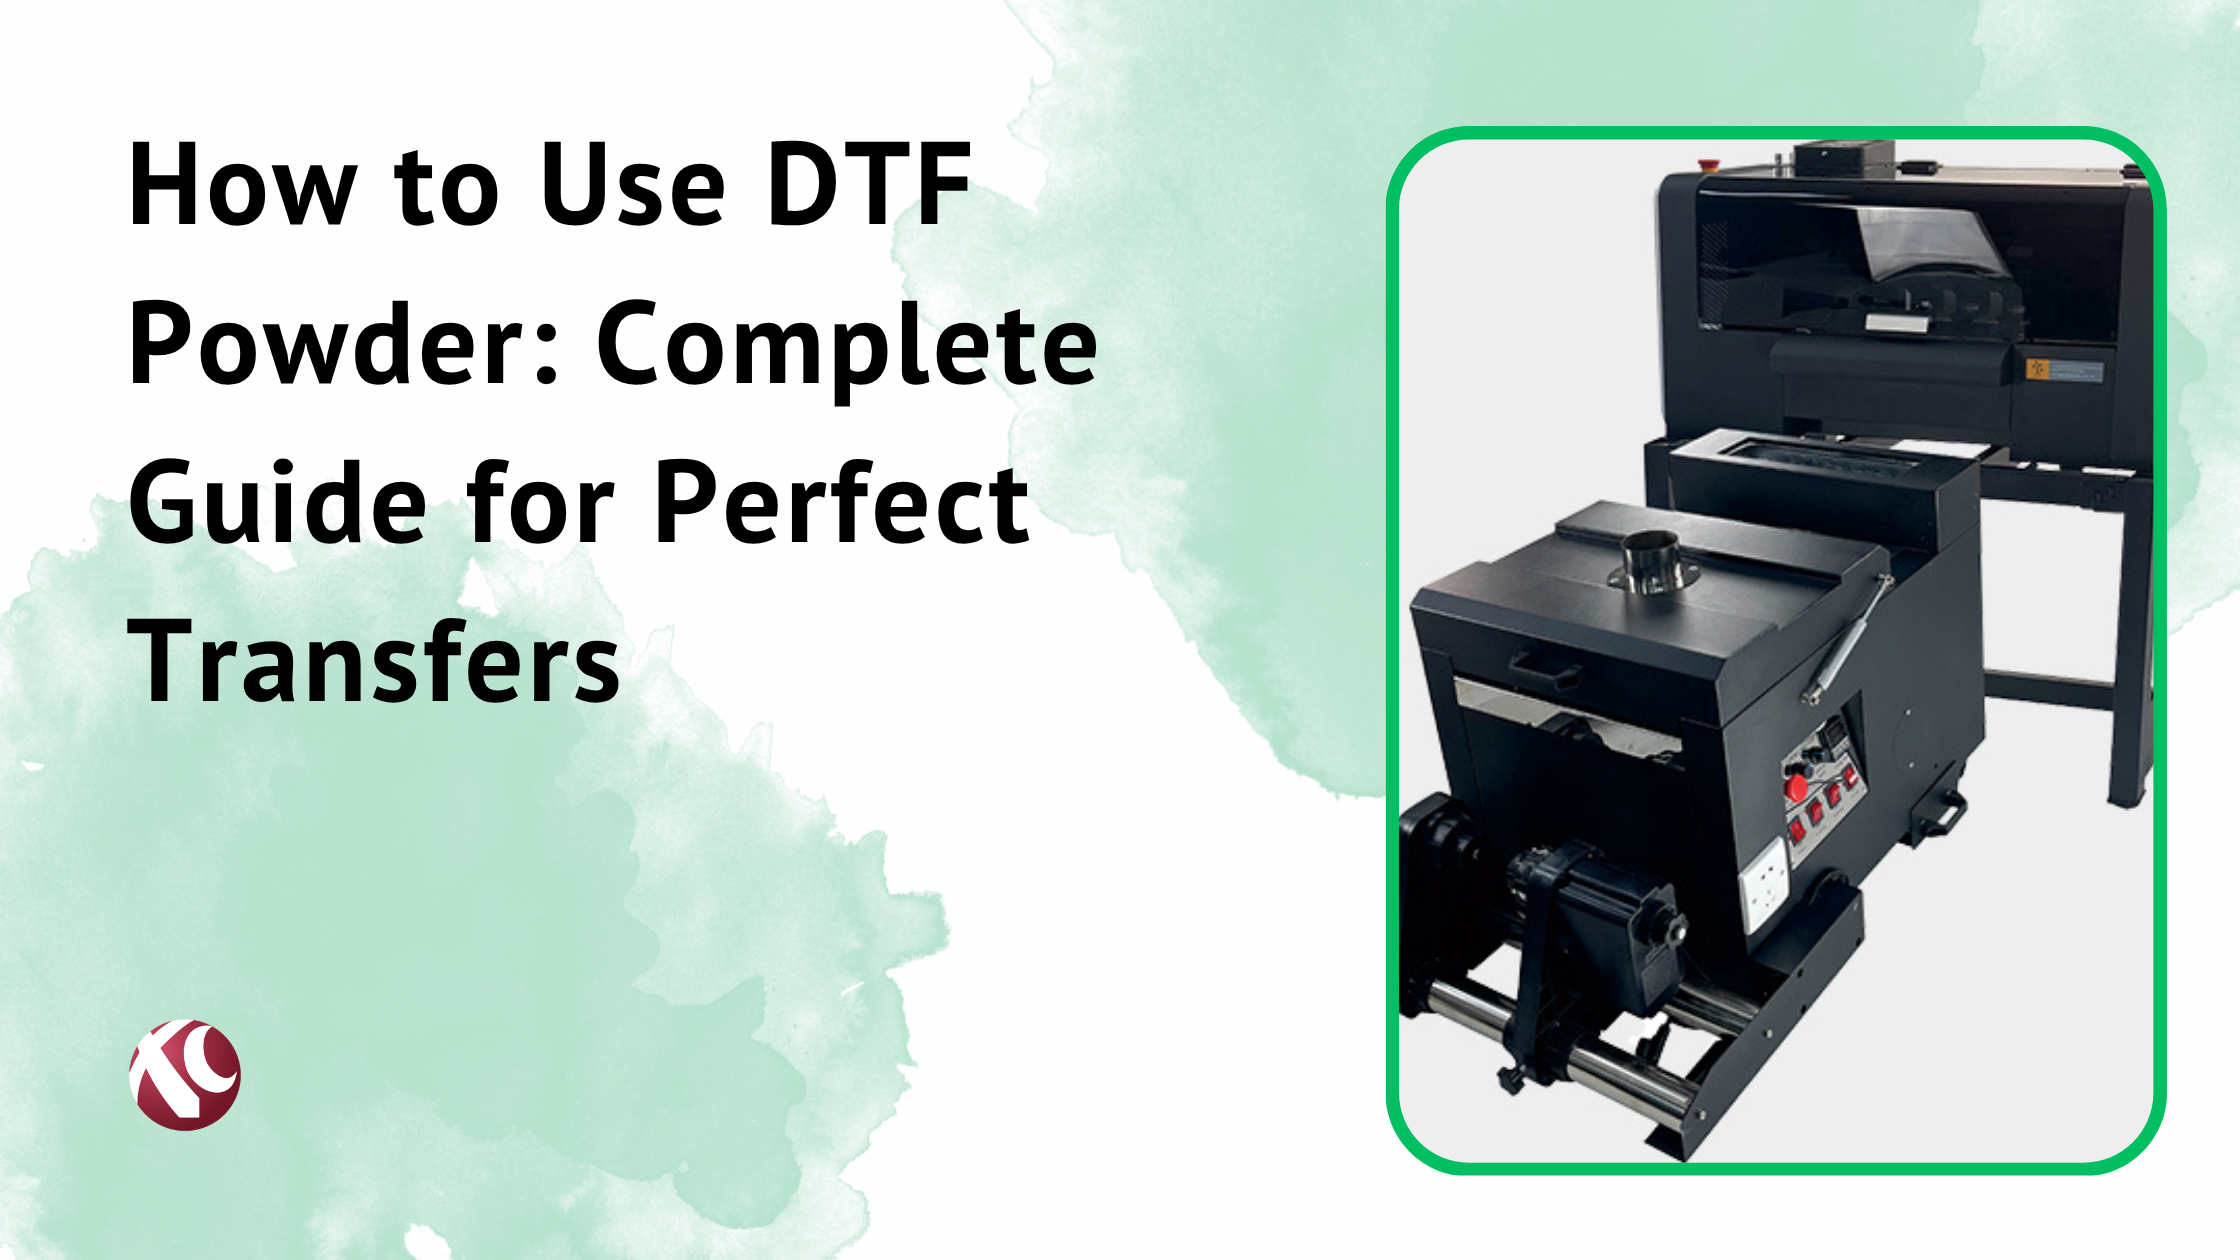
Look, if you’re in the custom apparel business right now and you’re not at least considering DTF printing, you’re probably leaving money on the table. I’ve watched this technology go from “interesting alternative” to “industry standard” in just a few years. And 2026? This is the year where DTF printers have hit that sweet spot between affordable and actually reliable.
The custom apparel market keeps growing. Print-on-demand businesses are everywhere. People want personalized everything—t-shirts, hoodies, bags, you name it. And DTF printing handles almost all of it.
Here’s what’s driving the shift. Screen printing still works great for huge runs. DTG has its place. But DTF? It sits right in the middle and actually does both jobs pretty well. Small orders? No problem. Big batches? Also fine. Dark fabrics, light fabrics, cotton, polyester, weird blends—DTF doesn’t really care.
In this guide, I’m breaking down everything you need to know before buying a DTF printer in 2026. How technology works. What features actually matter. What different printers cost and why. The stuff nobody tells you about maintenance and consumables. Real numbers on ROI.
Whether you’re starting a side hustle or scaling up a real operation, this is the stuff I wish someone had laid out for me clearly from the start.
What is DTF Printing?
DTF stands for Direct-to-Film printing. Simple name, simple concept.
Instead of printing directly onto fabric like DTG does, you print your design onto a special PET film first. Then you add adhesive powder. Then you cure it. Then you heat press the whole thing onto your garment.
Sounds like extra steps, right? It kind of is. But those extra steps solve a bunch of problems that other methods have.
Screen printing requires you to make separate screens for each color. Pain in the neck for small orders. DTG needs you to pretreat garments and works best on 100% cotton. DTF doesn’t care about any of that. Print on the film, transfer to basically any fabric, done.
That flexibility is why it’s becoming the go-to method in 2026. Shops don’t want three different machines for three different jobs. They want one workflow that handles most of what walks through the door.
How DTF Printing Technology Works
Let me walk through what actually happens step by step.
Step 1: Design Preparation You take your artwork and set it up in your RIP software. This is where you tell the printer how to handle the white ink layer—which is critical because that white layer goes down first and acts as the base for everything else.
Step 2: Printing on PET Film The printer lays down white ink first, then your CMYK colors on top. The film is specially coated so the ink sits right and doesn’t bleed. You’re essentially printing your design in reverse.
Step 3: Powder Adhesive Application Right after printing, while the ink is still wet, you coat the design with adhesive powder. This is the stuff that actually bonds to the fabric later. The powder sticks to the wet ink and doesn’t stick to the dry film. Pretty clever.
Step 4: Curing/Melting You run the film through a curing oven or use your heat press. The heat melts the adhesive powder and fuses it with the ink layer. Now you’ve got a solid, transferable design on the film.
Step 5: Heat Press Transfer You position the film on your garment, hit it with the heat press, and the adhesive bonds the whole design to the fabric. Peel the film off, and you’re done.
The white ink layer is honestly the most important part. On dark fabrics, without that white base, your colors would just disappear. The white provides opacity and makes everything pop.
Key Components of a DTF Printer
Not all DTF printers are built the same. The components inside make a huge difference in what you get out.
Print Head Technology This is the engine. Epson heads dominate the market—i3200, XP600, older 4720s. Print heads determine your speed, resolution, and how much you’ll pay when one eventually fails. Cheaper heads cost less to replace but wear out faster. Better heads cost more but last longer and print better. Classic tradeoff.
Ink Delivery System Most DTF printers use a continuous ink supply system (CISS). Bulk ink tanks feed the heads through tubes. Way more economical than cartridges for production work. The system needs to keep ink flowing consistently—any air bubbles or clogs and you’re dealing with print quality problems.
Powder Shaker Mechanism This applies the adhesive powder evenly. Entry-level machines might have you do this manually with a shaker tray. Better setups have automated powder applications built right into the workflow. Even coverage matters. Uneven powder means uneven adhesion.
Curing Oven/Dryer Melts the adhesive. Some printers have this integrated. Others use a separate conveyor oven. Temperature control and timing matter here—too hot or too long and you can damage the print.
RIP Software Your design goes through this before it hits the printer. The RIP handles color management, white ink generation, print queue management. Good RIP software makes your life easier. Bad RIP software makes everything harder than it should be.
Why Choose DTF Printers in 2026?
2026 is kind of a golden moment for DTF technology. The early kinks got worked out. Prices have come down. The machines just work better now.
Three or four years ago, DTF was still hit or miss. Print heads clogged constantly. Ink formulations weren’t great. The learning curve was steep because nobody really knew what they were doing yet.
Now? The technology is mature. Manufacturers have figured out the engineering. Third-party supplies have gotten better and more affordable. There’s actual documentation and community knowledge out there.
And the business case keeps getting stronger. Labor costs are up everywhere. DTF requires less manual work per print than screen printing. Setup time is basically nothing. You can print one shirt or a hundred with the same workflow.
Plus the versatility thing. One machine handles cotton, poly blends, nylon, even leather. Try doing that with DTG.
Advantages of DTF Printing
Let me run through the real benefits:
Works on pretty much any fabric. Cotton, polyester, cotton-poly blends, nylon, leather, canvas. Light colors, dark colors. This alone makes it worth considering. No more turning away jobs because your equipment can’t handle the fabric.
No pretreatment required. DTG makes you spray pretreatment on every garment before printing on dark fabrics. Adds time, adds cost, adds mess. DTF skips all that.
Colors are vibrant. Like, really vibrant. The white base layer makes CMYK colors pop in a way that other methods struggle to match on dark fabrics.
Excellent washability. Done right, DTF transfers last. They stretch with the fabric, they survive the dryer, they don’t crack like cheap vinyl after a few washes. Customers notice this stuff.
Cost-effective at basically any volume. Small orders don’t kill your margins because there’s no setup cost. Large orders work fine because you can batch efficiently. That flexibility is rare.
Easy to learn. The learning curve exists, but it’s not as steep as screen printing where you need to learn a whole different skill set. Most people can produce decent work within a few days of practice.
Minimal waste. You print what you need on the film, cut it out, transfer it. No wasted screens, no inventory of pre-made transfers sitting around.
Faster production. Compared to screen printing setup time, especially for multicolor designs, DTF is just faster. Design to finished product in minutes, not hours.
Soft hand feel. The finished transfer is thin and flexible. Doesn’t feel like a big rubbery patch on the shirt. Customers prefer this.
Limitations to Consider
I’d be lying if I said DTF was perfect. It’s not. Here’s what you’re dealing with:
Initial investment isn’t cheap. A decent desktop setup runs several thousand dollars minimum. Add heat press, supplies, and you’re into it for real money before you print your first shirt. Not a huge barrier, but it’s not zero either.
There’s a learning curve. Even though it’s easier than screen printing, you still need to dial in your settings. Temperature, pressure, curing time, white ink density—all of this affects results. Expect to waste some film and powder while you learn.
Consumables cost money. Film and powder are ongoing expenses. They’re not crazy expensive, but they’re not free. Factor this into your per-print costs.
Maintenance is real. Print heads clog if you don’t use them regularly. Cleaning cycles use ink. Powder shakers need cleaning. It’s not high maintenance compared to some equipment, but it’s not maintenance-free either.
Space requirements. Depending on your setup, you might need room for the printer, a separate powder shaker, a curing oven, plus a heat press. All-in-one systems help, but industrial setups take up space.
Most of these limitations have workarounds. Budget for consumables from the start. Build maintenance into your routine. Plan your space before you buy. They’re manageable if you know about them going in.
Types of DTF Printers in 2026
The market has really segmented into clear categories now. Each type targets a different user.
Desktop DTF Printers
These are your entry point. Compact machines, usually A3 or A3+ print width. They sit on a desk or small table.
Perfect for: Side hustles, home businesses, startups testing the market, small print shops adding DTF capability.
Production capacity is modest. Maybe 20-40 transfers per hour depending on size and detail. That’s plenty for someone doing custom orders and local customers. Not enough if you’re trying to supply retailers.
Price range in 2026 typically runs $2,000 to $6,000 for the printer itself. Add another $1,000-2,000 for heat press and supplies to actually get producing.
The upside: Low barrier to entry, minimal space requirements, good for learning the technology.
The downside: You’ll outgrow it if business takes off. Production speed limits how much you can scale.
Mid-Size DTF Printers
These are 24-inch to 36-inch width machines. Step up in size, capability, and investment.
Ideal for: Growing businesses that have proven demand, medium print shops, anyone doing regular commercial volume.
Production capacity jumps significantly. Some machines in this range can push 8-15 square meters per hour. That’s real output.
You’re looking at $8,000 to $25,000 for mid-size equipment. Sometimes more depending on features.
Typically these have better print heads, more automation, sturdier build quality. Dual head configurations become common here. Integrated powder shaking and curing starts showing up.
The jump from desktop to mid-size is where most businesses see real efficiency gains. If you’re doing 50+ shirts a day consistently, this tier makes sense.
Industrial DTF Printers
Now we’re talking 60cm width and larger. These are serious production machines.
For: Large-scale operations, print factories, fulfillment centers, anyone doing high-volume production daily.
These machines run pretty much nonstop. Multi-head configurations. Automated everything. Some have dual CMYK systems for even faster output.
Investment is substantial. $25,000 to $100,000+ depending on configuration. You’re not buying this to see if DTF works for you. You’re buying this because you already know it does and you need volume.
ROI calculations look different at this level. Labor savings, throughput gains, consistency—all factor in. The machine might pay for itself in a year if you’re running real volume through it.
Key Features to Look for When Buying DTF Printers
This is where people mess up. They look at the price tag and maybe the print width, and that’s it. There’s so much more that affects your long-term experience.
1. Print Head Technology
The print head is probably the single most important component. It determines your print quality, your speed, and a big chunk of your operating costs.
Epson XP600 – Entry-level workhorse. You’ll find these in most desktop and budget mid-size machines. Decent quality, reasonable speed. Replacement cost is relatively low, which matters because these heads do wear out. Maybe $100-200 per head. Good enough for most small operations.
Epson i3200 – The current standard for serious production. Better print quality, faster output, longer lifespan. Replacement cost is higher—$400-700 per head depending on variant. Worth it if you’re doing volume.
Epson 4720 – Older generation, still found in some machines. Being phased out but plenty of them still running. Parts availability might become an issue eventually.
Newer 2026 models – Some manufacturers are introducing updated head technology. Pay attention to track record before jumping on something brand new. First adopters often find the bugs.
Resolution matters. Speed matters. But replacement cost might matter more over time. A head that lasts two years and costs $500 to replace is different math than a head that lasts six months and costs $150. Do the math for your expected volume.
2. Print Width and Production Capacity
Bigger isn’t always better. Match the printer to your actual needs.
First, figure out your realistic production requirements. How many prints per day? Per week? What sizes are most common?
A3+ desktop (about 13″ wide) handles typical t-shirt graphics fine. Single pieces, small batches, no problem.
24-inch machines let you gang up multiple smaller designs or do larger prints efficiently.
60cm and up is for people who know exactly why they need that width.
Speed ratings are usually given in square meters per hour. Be skeptical of manufacturer claims—those are often under ideal conditions. Real-world production is usually slower.
Think about growth. If you’re doing 30 shirts a day now but want to do 100 in a year, the desktop might not cut it. But if you’re doing 30 and expect to do 35 next year, don’t overbuy.
3. Ink System and Color Configuration
Standard configuration is CMYK plus White. Four colors plus the white base layer. This covers the vast majority of work.
Some machines offer dual CMYK configurations—two sets of color heads. This speeds up production significantly because you’re not waiting for white to dry before laying down colors.
CISS (Continuous Ink Supply System) is standard on production machines. Bulk ink bottles feeding through tubes. Way more economical than cartridges for any real volume.
Ink quality matters a lot. Not all DTF inks are equal. Cheap ink can clog heads, produce dull colors, and create transfers that don’t hold up in the wash. This isn’t where you want to cut corners.
Ink consumption varies by design. Heavy coverage uses more. White ink usage is usually the biggest variable because it depends on how much of your design needs a white base.
4. Powder Application System
Adhesive powder has to go on evenly. Uneven application means uneven adhesion means quality problems.
Manual application – You shake powder onto the wet print by hand using a tray or sifter. Works fine for low volume. Labor intensive for production work.
Automatic powder shakers – Machine handles powder application. Some are integrated into the printer, others are separate stations the film passes through. Worth the investment if you’re doing any real volume.
Look for powder recovery systems. Excess powder gets collected and reused instead of wasted. Saves money on consumables.
5. Curing and Drying System
After powder application, you need heat to melt the adhesive and fuse it with the ink.
Conveyor ovens – Film passes through at a controlled speed and temperature. Consistent results, hands-off operation. Essential for production.
Heat press curing – You can cure transfers with a heat press if you’re just getting started. Works but adds handling time.
Integrated curing – Built into all-in-one systems. Film comes out ready to transfer.
Temperature precision matters. Different powders and inks have optimal curing temperatures. Too low and adhesion suffers. Too hot and you can damage the print.
Energy efficiency is worth considering in 2026. These ovens run hot and run a lot. Electricity costs add up.
6. RIP Software Capabilities
RIP software sits between your design software and the printer. It handles color management, white ink generation, and production workflow.
Good RIP software makes a real difference:
- Accurate color matching through ICC profiles
- Control over white ink density and choke
- Gang multiple designs efficiently
- Queue management for production
- Works smoothly with your design software
Some printers come with proprietary RIP software. Others work with third-party solutions like Flexi, Wasatch, or specialized DTF RIP packages.
User-friendliness matters. Your operator needs to actually use this software every day. Overly complex software slows everything down.
7. Build Quality and Durability
Production equipment gets used hard. Cheap builds don’t last.
Look for:
- Solid metal frame construction (not flimsy sheet metal)
- Quality rails and guides for print head movement
- Sturdy film feeding mechanisms
- Good cable management (messy cables signal cheap construction)
Expected lifespan for quality DTF printers is typically 5-7 years with proper maintenance. Longer for industrial machines, possibly shorter for budget units.
Warranty coverage tells you something about manufacturer confidence. One year minimum. Two or three years is better. Read what’s actually covered.
Reviews from actual users matter more than spec sheets. Look for comments about long-term reliability, not just initial print quality.
8. Automation Features
Automation reduces labor and errors. Worth paying for if you’re doing production volume.
Auto film feeding – Printer handles the film roll automatically. No manual loading for each print.
Auto powder application – Already discussed this. Big time saver.
Integrated curing – Film comes out ready to transfer.
Production management software – Some systems track orders, manage queues, even connect to e-commerce platforms.
Calculate the ROI based on your labor costs and volume. Sometimes the cheaper manual machine plus labor costs more than the expensive automated one.
9. Maintenance Requirements
Every DTF printer requires maintenance. Know what you’re signing up for.
Daily: Run head cleaning cycles, check ink levels, basic wipe down.
Weekly: More thorough cleaning, powder shaker cleaning, check for any buildup.
Monthly: Deep cleaning, check wear parts, calibration verification.
Some printers have better maintenance designs than others. Easy access to print heads for cleaning. Simple procedures for common tasks. Good documentation.
Automatic cleaning cycles help but use ink. Find the balance between keeping heads healthy and not wasting too much ink on excessive cleaning.
Budget for maintenance supplies: cleaning solution, wiper blades, dampers, eventual print head replacement. These aren’t optional costs—they’re part of operation.
Top DTF Printer Brands in 2026
The market has matured enough that there are real differences between manufacturers. Some have solid track records. Others are newer players still proving themselves.
Choosing an established brand usually means better support, more available parts, and more community knowledge. But sometimes newer manufacturers bring innovation that established players are slow to adopt.
XC Inkjet DTF Printers
XC Inkjet—that’s the company behind xcinkjet.net—has positioned themselves as a manufacturer that actually understands what production shops need.
Their lineup covers the full range from desktop entry-level to industrial production machines. What I notice about their approach is the focus on practical features over marketing specs.
Product Range: Desktop A3+ models for startups. Mid-size 24″ and 60cm machines for growing businesses. Industrial configurations for high-volume operations.
Technology Differentiators: They use proven Epson print head technology—i3200 in their production machines, XP600 in entry models. No experimental stuff that might leave you without parts support.
Their ink systems are designed for consistent flow. That matters more than people realize. Inconsistent ink delivery causes head clogs and print quality problems.
Target Market: Clearly aimed at print businesses, not hobbyists. The feature sets and construction quality reflect commercial use expectations.
Support and Warranty: This is where manufacturer choice really matters. XC Inkjet provides technical support and stands behind their equipment. When something goes wrong—and something always eventually goes wrong—you want responsive support.
Pricing: Positioned as value-focused. Not the cheapest, not the most expensive. Competitive pricing with quality that justifies the investment.
For someone looking at DTF printers in 2026, XC Inkjet is worth serious consideration, especially if you want a manufacturer that actually supports their equipment after the sale.
Other Leading DTF Printer Manufacturers
The market has several other players worth knowing about:
Prestige Direct To Film – Been in the DTF space since early adoption. Known for all-in-one compact systems. Good for smaller operations wanting simplicity.
Mimaki – Industrial printing background. Premium pricing, premium build quality. Their DTF offerings target serious production shops willing to pay for reliability.
Roland DG – Also from the commercial printing world. Strong on color accuracy and build quality. Higher price point but solid equipment.
Epson – Worth mentioning because their print heads dominate the market. They’ve started offering their own DTF solutions leveraging that vertical integration.
Various Chinese manufacturers – Wide range of quality. Some excellent value options, some questionable reliability. Do your research carefully if going this route.
The difference between manufacturers mostly comes down to: build quality, support quality, and long-term reliability. Print quality is pretty similar across brands using the same head technology—it’s everything else that varies.
DTF Printer Cost Analysis 2026
Sticker price is just the start. Total cost of ownership is what actually matters for your business.
Initial Investment Breakdown
Let me give you realistic 2026 numbers:
Desktop DTF Printers: $2,000 – $6,000 The lower end gets you basic machines that work but lack features. The higher end gets you better heads, sturdier construction, more automation.
Mid-Size DTF Printers: $8,000 – $25,000 Wide range because this category spans from “big desktop” to “small industrial.” Features scale with price.
Industrial DTF Printers: $25,000 – $100,000+ Serious production equipment. Multi-head configurations. Full automation. Built to run all day every day.
Beyond the printer itself:
Heat press: $500 – $3,000+ depending on size and features. You need one to actually transfer anything.
Starting supplies: $500 – $1,500 for film rolls, powder, ink to get going.
Setup and space: Variable depending on your situation. Might need electrical upgrades, ventilation, tables, storage.
Training: Some manufacturers include it. Others charge extra. Factor it in.
Software: Some printers come with RIP software. Others require separate purchase. $200 – $1,000+ depending on what you need.
Realistic starting budgets:
- Home startup with desktop: $4,000 – $8,000 all-in
- Small commercial operation with mid-size: $15,000 – $35,000
- Production facility with industrial: $50,000+
Operating Costs and Consumables
This is where people get surprised after buying. The ongoing costs are real.
DTF Ink: Roughly $50-80 per liter for quality CMYK ink. White ink runs higher—$80-120 per liter. You’ll use more white than any single color because it’s in every print on dark fabrics.
Per-print ink cost varies wildly by design. Simple small design might be $0.10 in ink. Full-coverage large design could be $0.50 or more. Average somewhere in the $0.15-0.30 range for typical t-shirt graphics.
DTF Film: Roughly $0.15-0.40 per A3 sheet or equivalent area. Roll film is more economical than cut sheets for production.
Adhesive Powder: About $15-30 per kilogram. Usage varies but figure $0.02-0.05 per transfer.
Electricity: Printers aren’t huge draws. Curing ovens use real power though. Budget for it in your operating costs.
Maintenance supplies: Cleaning solution, wiper blades, occasional parts. Maybe $50-100 per month for active production.
Total per-print cost for a typical t-shirt transfer: $0.25-0.60 depending on design size, ink coverage, and how efficiently you run.
That’s just the transfer. You still have the blank garment, labor, packaging, and overhead.
ROI Calculation Guide
Here’s a simple framework:
Step 1: Estimate your profit per print If you charge $15 for a custom shirt, your blank costs $5, transfer costs $0.40, labor is $2, your gross profit is $7.60 per shirt.
Step 2: Estimate realistic monthly volume Be honest here. What can you actually sell and produce? Maybe 200 shirts per month starting out.
Step 3: Calculate monthly gross profit 200 shirts × $7.60 = $1,520 per month gross profit.
Step 4: Account for equipment investment $6,000 total investment ÷ $1,520 monthly profit = 3.9 months to break even on equipment.
Some scenarios:
Startup selling at farmer’s markets: 100 shirts/month at $8 profit = $800/month $4,000 investment = 5 months to break even
Small e-commerce operation: 400 shirts/month at $7 profit = $2,800/month $15,000 investment = 5.4 months to break even
Established print shop adding DTF: 1,000 shirts/month at $6 profit = $6,000/month $25,000 investment = 4.2 months to break even
These numbers work better than a lot of business equipment investments. DTF’s flexibility and low per-unit cost make the economics favorable.
Financing and Payment Options
Not everyone can write a check for $15,000. Options exist.
Equipment leasing: Spread payments over 2-5 years. Preserve capital. Payments are often tax deductible as operating expense.
Manufacturer financing: Some brands offer payment plans directly. XC Inkjet and others have programs for qualified buyers.
Equipment loans: Traditional business loans for equipment purchases. Often favorable rates because the equipment serves as collateral.
Business credit cards: For smaller purchases like desktop systems. Watch the interest rates.
Tax advantages: Section 179 deduction may let you write off equipment purchases in the year of acquisition. Talk to your accountant about 2026 rules.
Leasing vs. buying is a real decision. Leasing preserves cash and often includes maintenance. Buying gives you ownership and no payments after payoff. Depends on your cash position and how quickly you expect technology to change.
Essential DTF Printing Supplies and Accessories

The printer alone doesn’t produce finished products. Here’s everything else you need.
DTF Films
This is what you print on before transferring.
Types: Most DTF film is PET (polyethylene terephthalate) with a special coating that holds ink correctly.
Thickness: Usually 75 microns for most applications. Thinner films can be trickier to handle. Thicker isn’t necessarily better.
Hot Peel vs. Cold Peel: Hot peel films can be removed immediately after pressing while still warm. Faster workflow but requires some technique.
Cold peel films need to cool completely before removing. More forgiving for beginners, slightly slower workflow.
Sheet vs. Roll: Sheets are easier for beginners and small batches. Rolls are more economical and work better with automated feeding systems.
Storage: Keep film in original packaging until use. Away from direct sunlight. Moderate temperature and humidity. Film has a shelf life—use older stock first.
Quality varies between suppliers. Bad film causes all sorts of problems—ink not adhering, powder not sticking, poor transfers. Find a reliable source and stick with it.
DTF Inks
Not all inks are equal. This is not where you want to cheap out.
Formulation: DTF inks are specifically formulated for this application. Don’t use regular inkjet ink or DTG ink. It won’t work right.
CMYK + White: Standard configuration. Cyan, Magenta, Yellow, Black plus White. The white is crucial for opacity on dark fabrics.
OEM vs. Third-Party: Printer manufacturer inks (OEM) are optimized for their machines but cost more. Third-party inks can save money but quality varies wildly.
My take: Start with OEM or recommended inks. Once you understand how everything should work, you can experiment with alternatives. Don’t troubleshoot bad ink when you’re still learning everything else.
Quality Indicators: Vibrant colors. Good washability. Smooth flow without clogging. Proper adhesion to film.
Storage: Cool, dark place. Don’t let ink freeze. Use within manufacturer’s recommended timeframe. Shake gently before use if ink has been sitting.
DTF Adhesive Powder
The magic ingredient that actually bonds your design to fabric.
Mesh sizes: Different powder granule sizes for different applications. Finer mesh for detailed work. Coarser mesh for bold designs. Most suppliers offer an all-purpose grade that works for typical work.
Quality signs: Even granule size. White color (some cheap powder has off colors). Free-flowing without clumping. Melts cleanly when cured.
Storage: Keep it dry. Humidity causes clumping. Seal containers. Some people keep desiccant packets in their powder storage.
Usage: Cover the ink completely but don’t pile it on excessively. Excess powder gets shaken off. More isn’t better—it’s just waste.
Heat Press Requirements for DTF
Your heat press is half of the transfer equation. Skimping here affects every print.
Temperature: DTF typically transfers at 285-320°F (140-160°C). Your press needs accurate temperature control across the entire platen.
Pressure: Medium to firm pressure. Inconsistent pressure means inconsistent transfers. Look for even pressure across the platen surface.
Types:
Clamshell: Opens like a clamshell. Compact, affordable. Works fine for most DTF work.
Swing-away: Platen swings to the side. Easier garment positioning, less risk of burning yourself.
Draw/slide-out: Platen slides out for positioning. Excellent for production but takes more space.
Auto-open: Automatically releases when time completes. Prevents over-pressing. Nice feature for production.
Size: Match to your printer width and typical jobs. 15×15″ handles most t-shirt work. Larger platens for bigger prints.
Other Essential Accessories
Film cutting tools: Scissors work but slow you down. A good rotary cutter and cutting mat speeds things up. Some operations use automated cutting.
Cleaning supplies: Lint-free cloths. Cleaning solution compatible with your printer. Gloves for handling film and maintenance.
Environment control: Hygrometer to monitor humidity. Space heater or dehumidifier as needed. DTF printing is sensitive to environment.
Storage solutions: Film storage that protects from dust and light. Powder containers that seal properly. Ink storage at proper temperature.
Safety equipment: Gloves for handling powder and chemicals. Adequate ventilation. Fire safety (heat press is a fire risk if unattended).
Weeding tools: Tweezers and picks for handling small transfers. Not strictly necessary but helpful.
How to Choose the Right DTF Printer for Your Business
This isn’t about finding the “best” printer. It’s about finding the right printer for your situation.
Assess Your Business Needs
Before looking at any equipment, answer these honestly:
Current volume: How many pieces are you realistically doing now? Don’t count aspirations—count actual current work.
Projected growth: Where do you want to be in 1 year? 3 years? Be realistic but optimistic.
Product types: T-shirts only? Or also bags, hats, koozies, etc.? This affects size requirements.
Budget: What can you actually spend? Include everything, not just the printer.
Space: What room do you actually have? Measure it. Include workspace around equipment.
Skills: What’s your comfort level with technology? Who will operate this daily?
Timeline: How quickly do customers need finished products?
Write these answers down. They’ll guide every decision.
Small Business and Startup Recommendations
If you’re just getting started or testing the market:
Start with a desktop A3+ system. Seriously. I know it’s tempting to go bigger, but starting smaller lets you learn without massive risk.
Budget approach: Desktop DTF printer: $2,500-4,000 Heat press: $500-1,000 Supplies to start: $500-1,000 Total: ~$4,000-6,000
This lets you produce real products, test your market, learn the technology, and build cash flow.
The learning curve is real. Better to make mistakes on a $3,000 machine than a $15,000 machine.
When you’re consistently maxing out the desktop’s capacity and have consistent demand, then upgrade. You’ll know exactly what features you need because you’ll have experienced the limitations firsthand.
Look for printers with good support and documentation. When you’re learning, being able to get help matters more than raw specs.
Medium to Large Operation Recommendations
If you have established demand and need production capacity:
Start by calculating your true requirements. What’s your peak daily demand? Size your equipment for typical days, not just the busiest.
Multiple smaller printers vs. one big one: Two mid-size printers give you redundancy. If one goes down, you’re not dead in the water. One big printer is simpler to manage but single point of failure.
Automation priorities: At volume, automation pays off. Auto powder application, integrated curing, automated film feeding—these save labor hours that add up fast.
Training considerations: More complex equipment needs trained operators. Budget for training time. Consider having more than one person trained so you’re not dependent on a single employee.
Workflow integration: How does DTF fit with your existing operation? Where does it go physically? How do jobs flow through? Think about this before buying.
Print-on-Demand Business Considerations
POD is its own animal. Different priorities.
Speed matters: Customers expect fast shipping. Your whole workflow—from order to shipped—needs to be tight. Equipment that saves minutes per order saves hours per day.
Variety: You’re probably doing lots of different designs in small quantities. Setup time needs to be minimal. DTF is inherently good at this, but workflow efficiency still matters.
Quality consistency: Every order is potentially a new customer. Inconsistent quality kills repeat business and generates returns. Reliable equipment and dialed-in processes matter.
Setting Up Your DTF Printing Operation

Buying the equipment is step one. Setting it up properly is where many people struggle.
Space and Environmental Requirements
DTF printing is more sensitive to environment than you might expect.
Space minimums: Desktop setup: 6′ x 8′ minimum including workspace Mid-size setup: 10′ x 12′ minimum Industrial: Size varies, plan carefully
Include space for: the printer itself, curing system, heat press, supply storage, work area for handling garments.
Ventilation: DTF inks and powders produce some fumes and particles. You need airflow. A dedicated space with ventilation is ideal. At minimum, open windows and a fan. Larger operations might need exhaust systems.
Temperature: 68-77°F (20-25°C) is the sweet spot. Too cold and ink gets viscous. Too hot and things dry too fast. Temperature swings cause problems.
Humidity: 45-60% relative humidity ideal. Too dry and static becomes an issue. Too humid and powder clumps and film doesn’t behave right.
Electrical: Most desktop printers run on standard outlets. Larger equipment might need dedicated circuits. Curing ovens pull real amperage. Get this right before installation.
Flooring: Powder gets everywhere. Hard flooring is way easier to clean than carpet. Consider this when choosing space.
Installation and Initial Setup
Professional vs. DIY: Desktop systems usually have manageable DIY setup. Follow the instructions carefully.
Larger systems often benefit from professional installation. Manufacturer or authorized installer ensures everything is right.
Initial calibration: Print heads need alignment. This affects print quality significantly. Take time to get it right.
Color management: ICC profiles make colors accurate. Your RIP software needs profiles for your specific ink and film combination. Generic profiles are a starting point. Custom profiles are better.
Test prints: Before running real jobs, make test prints. Check alignment. Check color. Check transfers. Work out issues before they affect paying customers.
Document your baseline: Write down your working settings. Temperature, speed, pressure, ink densities. When things go wrong later, you need to know what “right” looked like.
Staff Training and Skill Development
People run the machines. Training matters.
Operator basics:
- Daily startup and shutdown procedures
- Loading film and supplies
- Basic print job operation
- Quality checking
- Routine cleaning
- Recognizing common problems
Most people can learn basic operation in a few days. Proficiency takes longer.
Design skills: Someone needs to prepare artwork. Understand file formats, resolution, color modes, white layer setup. This can be the operator or a separate design person.
Troubleshooting: Beyond just “call for help.” Operators should handle basic issues: minor head cleaning, film jams, simple adjustments. Saves downtime.
Training sources:
- Manufacturer training (often included or available)
- Online tutorials and courses
- User communities and forums
- Practice, practice, practice
Don’t skip training to save time. Poorly trained operators waste more time (and materials) than training costs.
DTF Printing Best Practices and Tips
Once you’re set up, these practices separate struggling shops from successful ones.
Design Preparation for DTF
Garbage in, garbage out. Good prints start with good files.
File formats: PNG is typically best for DTF. Supports transparency. High-resolution PNG at 300 DPI is standard.
Resolution: 300 DPI at print size minimum. For large prints, you might get away with 200 DPI. For detailed work, consider going higher.
Color mode: Design in RGB if your RIP converts. Some workflows prefer CMYK. Know your specific software chain.
White underbase: Your RIP software generates this, but you need to understand it. The white layer provides opacity on dark fabrics. Controls include density and “choke” (how far the white extends under the color edges).
Optimizing Print Quality
Getting consistently good prints takes attention to detail.
Calibration is not optional: Run calibration routines regularly. Print heads drift over time. Environment changes affect things. Calibrate.
White ink density: Too little white and colors look dull on dark fabric. Too much white wastes ink and can affect hand feel.
Production Workflow Efficiency
Time is money. Efficient workflow multiplies your capacity.
Gang your layouts: Put multiple designs on one film where possible. Maximizes film usage, reduces waste.
Quality checkpoints: Check prints before curing. Check transfers before packaging. Catching problems early saves rework.
Common DTF Printing Issues and Solutions
Problems happen. Knowing how to fix them quickly matters.
Print Quality Problems
Banding (horizontal lines): Usually print head issue. Run cleaning cycles. If persistent, might need head alignment or eventually head replacement. Can also be caused by film movement during printing—check film tension.
Color inaccuracy: ICC profile issues. Wrong settings in RIP. Or ink issues. Check your profiles first. Make sure you’re using the right settings for your materials. Old or contaminated ink can also cause color shift.
White ink problems: Most common DTF issue. White ink settles and clogs more than colors. Requires agitation/stirring system. Run white prints regularly even if you don’t need them—keeps the white flowing. If white starts looking thin or spotty, cleaning and potentially head maintenance is needed.
Fuzzy or low-resolution prints: Usually source file issue. Check your artwork resolution. Sometimes RIP settings cause this—check your print quality settings.
Transfer and Adhesion Issues
Powder not adhering to ink: Either ink is too dry (powder applied too late) or wrong powder mesh. Powder needs to go on while ink is wet. Automated systems solve timing issues.
Transfer not sticking to fabric: Temperature, time, or pressure is off. Check heat press calibration. Also check that curing was done properly—undercured transfers don’t adhere well. Some fabrics need slightly different settings.
Equipment Malfunctions
Print head clogs: Most common mechanical issue. Regular cleaning prevents most clogs. For stubborn clogs, try soaking cleaning or automated purge cycles. Severe clogs might need manual intervention or professional service.
Film feeding problems: Check film roll installation. Check for debris in feed mechanism. Make sure film tension is correct. Wrinkled or curved film feeds poorly.
Powder shaker issues: Usually cleanliness related. Powder builds up and clogs mesh. Regular cleaning prevents this. Humidity can cause powder clumping—control your environment.
Software problems: Try restarting software and printer. Check connections. Update drivers if available. Software glitches often solve with basic troubleshooting. Contact support if persistent.
DTF Printing vs. Other Methods
DTF isn’t the only option. Understanding alternatives helps you know when DTF makes sense.
DTF vs. DTG (Direct-to-Garment) Printing
Both are digital printing. Different approaches.
Technology: DTG prints directly onto fabric. DTF prints onto film, then transfers.
Fabric compatibility: DTG works best on 100% cotton. Struggles with polyester. DTF works on practically anything.
Pretreatment: DTG requires pretreatment on dark fabrics. Adds time and cost. DTF requires no pretreatment.
Print quality: Both produce excellent quality. DTG can look slightly softer on ideal fabrics. DTF has more vibrant whites on dark fabrics.
Production speed: DTG is slower per garment (pretreat, print, cure). DTF can be batched and transferred quickly.
When to choose DTG: High-volume cotton work where softest hand feel is priority.
When to choose DTF: Mixed fabric types, dark fabrics, polyester, and more flexibility.
DTF vs. Screen Printing
Traditional meets digital.
Setup: Screen printing requires screens for each color. Significant setup time and cost for new designs. DTF has zero setup for new designs.
Quality: Screen printing has a particular look many people prefer. Bold colors, thick deposits. DTF has different characteristics—can handle photographic detail better.
Volume economics: Screen printing wins on very high volumes. The per-print cost drops dramatically once setup is done. DTF has consistent per-print cost regardless of volume.
When to choose screen printing: Large runs (hundreds+) of the same design. When classic screen print aesthetics is desired.
When to choose DTF: Small runs, custom orders, varied designs, quick turnaround.
DTF vs. Sublimation Printing
Both involve transfers, but fundamentally different technology.
Process: Sublimation uses heat to turn ink into gas that bonds with polyester fibers. DTF uses adhesive layer that sits on top of fabric.
Fabric limitation: Sublimation only works on polyester or poly-coated materials. Cannot do cotton. DTF does everything.
Results: Sublimation becomes part of the fabric—zero hand feel, extremely durable. DTF sits on top—slight feel, but works on any color.
When to choose sublimation: 100% polyester products, sportswear, white or light poly fabrics.
When to choose DTF: Cotton, dark colors, blends, versatility.
DTF vs. Vinyl Heat Transfer
Different worlds, actually.
Process: Vinyl is cut from colored sheets, weeded (removing waste), and pressed. DTF is printed full-color and pressed.
Color: Vinyl typically uses solid colors, layered for multicolor designs. DTF prints full color, gradients, photographic images easily.
What is the lifespan of a DTF printer?
Expect 5-7 years from quality equipment with proper maintenance. Some machines last longer.
The main variable is how well you maintain it. Print heads are usually the first major component to need replacement, and they’re replaceable.
Budget machines might only last 2-3 years of heavy use. Industrial machines built for production can go 10+ years.
Can DTF prints withstand multiple washes?
Yes. Properly made DTF transfers last 50+ washes easily. Some users report still-good transfers after 100+ washes.
Keys to durability:
- Quality ink
- Proper curing
- Correct heat press temperature, time, and pressure
- Following care instructions (wash inside out, low heat dry)
DTF outlasts many other methods in wash testing.
How long does it take to learn DTF printing?
Basic operation: A few days to a week.
Getting consistently good results: 2-4 weeks.
Mastering efficiency and troubleshooting: A few months of regular practice.
It’s not hard, but it’s not instant either. The technology is straightforward. The learning is mostly in dialing in your specific settings and workflow.
Most people produce sellable product within their first week.
What is the minimum order quantity for DTF printing?
One. Literally one.
That’s one of DTF’s biggest advantages. There’s no setup cost or minimum economically viable quantity. Printing one shirt costs the same per unit as printing fifty.
This makes DTF ideal for:
- Custom one-off orders
- Samples
- Print-on-demand business models
- Small test runs
Compare to screen printing where you typically need at least 12-24 pieces to make economic sense.
Can I print white or light-colored designs on dark fabrics?
Absolutely. That’s one of DTF’s strengths.
The white ink layer acts as an opaque base. Any design—including white and light colors—shows vibrantly on any fabric color.
In fact, DTF does white-on-dark better than most methods. DTG struggles with this. Vinyl requires white vinyl. Screen printing needs white ink screens. DTF just… does it.